


TL;DR:
- Personalized wood name cutouts add character to nurseries and can be customized in various styles.
- They can be DIY projects or purchased ready-made, with options for different finishes and themes.
- Proper safe installation and care ensure they remain a lasting, child-safe nursery decor.
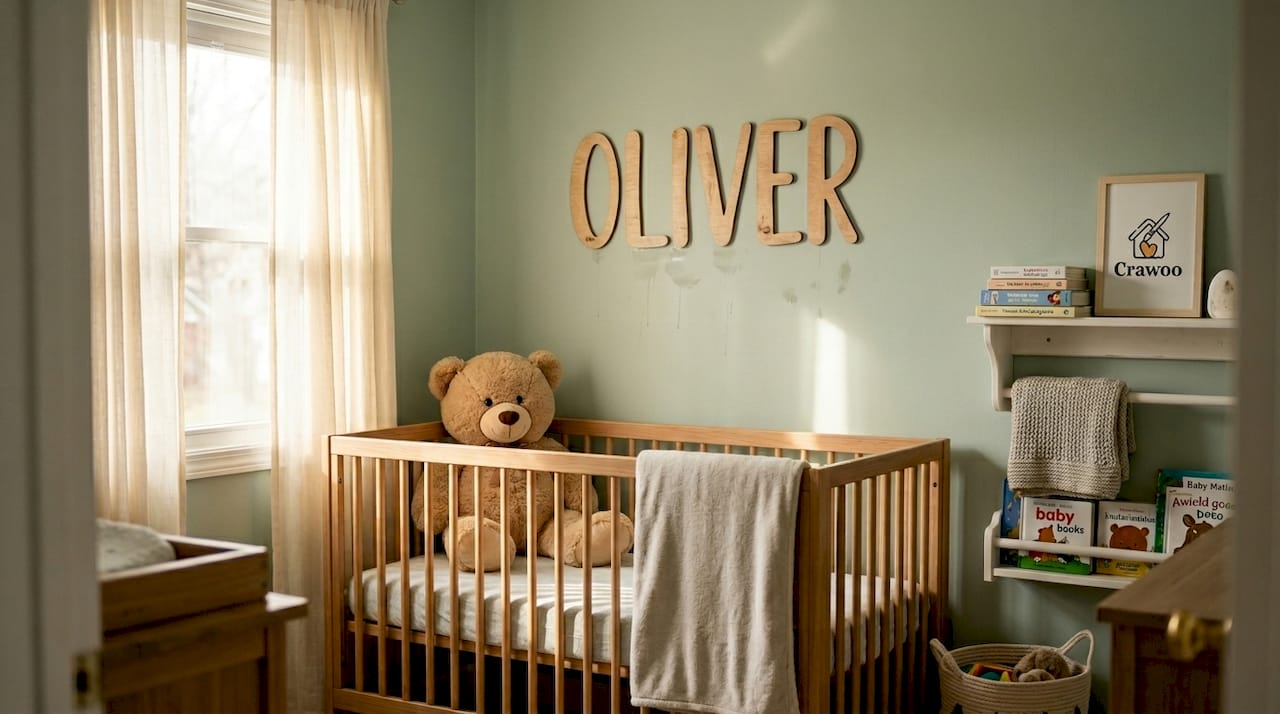
Personalized nursery decor sounds like it should cost a fortune or require a craft degree. It doesn’t. Baby name wood cutouts have quietly become one of the most popular ways to give a nursery real character, and the best part is that they’re far more accessible than most parents expect. Whether you’re planning a woodland theme, a minimalist setup, or something ocean-inspired, a custom wood name sign can anchor the whole room. This guide walks you through everything: what these cutouts actually are, which styles work best, how to make or buy one, and how to display it safely.
Table of Contents
- What is a baby name wood cutout?
- Popular styles and decor ideas
- Should you buy or DIY a baby name wood cutout?
- Safe installation and care tips
- A practical perspective on personalization: what most parents overlook
- Find or create your perfect baby name wood cutout
- Frequently asked questions
Key Takeaways
| Point | Details |
|---|---|
| Personal touch | Baby name wood cutouts add a uniquely personal and memorable accent to any nursery. |
| Flexible style options | You can customize wood cutouts in size, color, shape, and theme to match your decor vision. |
| DIY or buy | Both crafting and purchasing readymade options are accessible for most parents, each with pros and cons. |
| Safety comes first | Using safe materials and proper installation ensures these decorations are suitable for your baby’s room. |
What is a baby name wood cutout?
A baby name wood cutout is exactly what it sounds like: a wooden sign cut or shaped to spell out a baby’s name. These signs are crafted from real wood, plywood, or MDF and can be cut by hand, with a scroll saw, or using a laser cutter for precision. The result is a decorative piece that feels personal in a way that mass-produced wall art simply can’t match.
What makes them distinctive is the level of customization available. You’re not choosing from a set of generic designs. You’re selecting the font, the size, the finish, and sometimes the shape of each individual letter. A
Here’s what you can typically customize:
- Font style: Script, serif, block, or handwritten
- Letter size: From small shelf pieces to large statement wall art
- Finish: Natural, painted, stained, whitewashed, or gilded
- Shape: Freestanding letters, a single plaque, or individual cutouts per letter
- Theme elements: Animals, stars, clouds, or botanical accents added around the name
Parents love these signs for a few reasons beyond just how they look. First, they serve as a photo prop during newborn shoots. Second, they become a genuine keepsake, something you might move from the nursery to a bedroom wall and eventually to a memory box. Third, they make the space feel intentional. A room with a child’s name on the wall says this space was made for you.
If you’re interested in making one yourself, DIY wood name signs are a great starting point for understanding the process. Or if you’d prefer to skip the crafting and go straight to a finished product, custom wood name signs give you full control over the design without the hands-on work.
Popular styles and decor ideas
Once you know what a cutout is, the next question is how it can fit your nursery aesthetic. The good news is that these signs are incredibly versatile. Styles range from simple block letters to multi-layered themed designs, with painting and Cricut vinyl being the most popular customization methods.
Here’s a quick comparison of the most common styles:
| Style | Best for | Finish options |
|---|---|---|
| Script letters | Soft, romantic nurseries | Natural, painted, gilded |
| Block font | Modern or minimalist rooms | Stained, painted |
| Animal motif plaques | Woodland or jungle themes | Natural, multicolored |
| Round plaques | Boho or farmhouse nurseries | Whitewashed, stained |
| Layered themed signs | Ocean, storybook, celestial | Painted, multicolored |
Beyond font and shape, the finish you choose does a lot of heavy lifting. A natural wood finish with visible grain works beautifully in earthy or Scandinavian-inspired rooms. Painted signs in soft pastels suit classic nurseries. Bold, multicolored designs work well in playful, storybook-themed spaces.
Some creative placement ideas worth considering:
- Above the crib: The most classic placement, centered and at a safe height
- On a floating shelf: Leaning the sign against the wall adds a casual, layered look
- Gallery wall anchor: Use the name sign as the centerpiece with framed prints around it
- Door decor: A smaller cutout on the nursery door personalizes the entrance
- Bookshelf styling: Tuck individual letters between books and small plants
Pro Tip: If your nursery has a specific color palette, order or paint your sign after you’ve finalized the wall color. It’s much easier to match the sign to the wall than the other way around.
For broader inspiration across different room styles, browsing wood signs for home can help you see how these pieces translate beyond the nursery. And if you want detailed guidance on pulling a cohesive look together, personalized nursery sign tips covers the design process from start to finish.
Should you buy or DIY a baby name wood cutout?
With style inspiration in hand, let’s look at the practical decision: craft your own or buy ready-made? Both paths have real merit, and the right choice depends on your time, skill level, and how much customization you want.
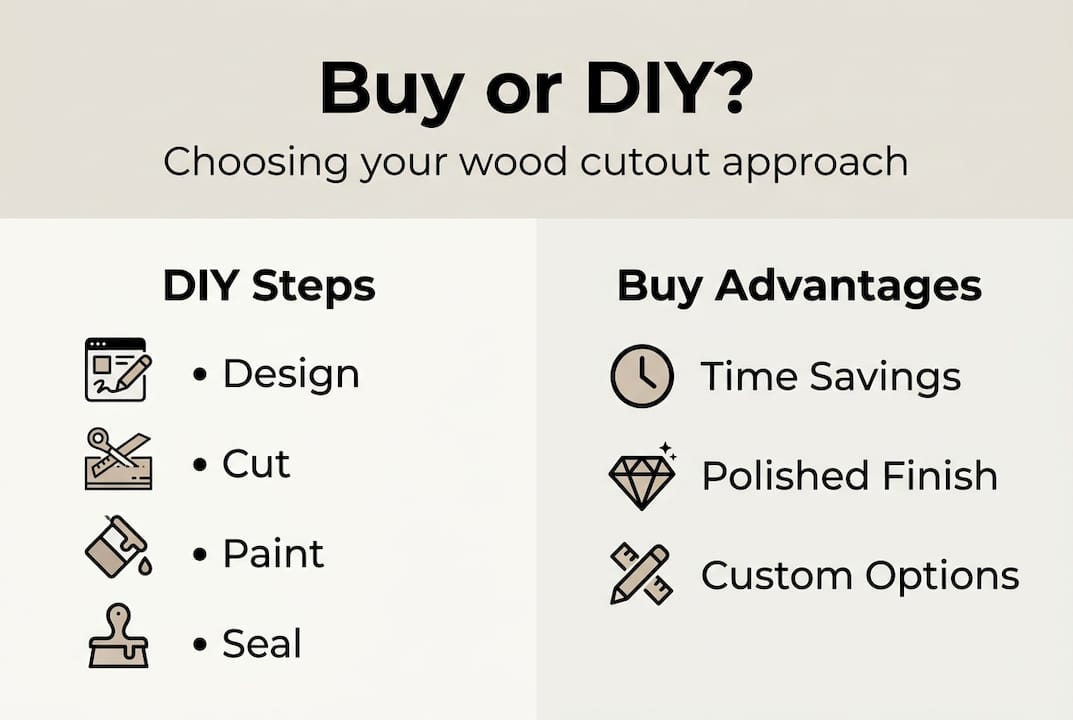
DIYing with Cricut or stencils can take 4 to 6 hours and cost anywhere from $15 to $100, depending on design complexity. Here’s a simple cost breakdown:
| Item | Estimated cost |
|---|---|
| Wood base or letters | $8 to $30 |
| Paint or stain | $5 to $20 |
| Vinyl (for Cricut method) | $5 to $15 |
| Sandpaper and sealant | $3 to $10 |
| Tools (if not owned) | $0 to $50 |
If you’re going the DIY route, here’s the basic process:
- Choose your wood base (a round slice, rectangular plank, or pre-cut letters)
- Sand the surface until smooth
- Apply a base coat of paint or stain and let it dry fully
- Use a Cricut machine to cut vinyl letter stencils, or hand-paint with a stencil
- Apply the letters or design carefully
- Seal the finished piece with a clear, non-toxic sealant
Pro Tip: If you’re new to Cricut, start with a simple one-word design in a bold font. Script fonts look stunning but require more precision when weeding the vinyl.
Buying a finished cutout, on the other hand, saves time and usually delivers a more polished result. When ordering, check for non-toxic finishes, read reviews on durability, and confirm that the seller offers real customization rather than just font swaps. For guidance on the painting side of things, painting wooden nursery signs is a helpful resource. And if you’re still weighing your options, the wooden name sign guide walks through both paths in detail.
Safe installation and care tips
Once you have your baby name wood cutout, it’s time to ensure it’s safely displayed and remains a lovely keepsake for years. Installation in a nursery requires a bit more thought than hanging art in a living room, because safety is the priority.
Follow these steps for secure and safe installation:
- Choose a wall location that is out of reach from the crib, at least 12 inches above the top rail
- Use wall anchors rated for the weight of your sign, not just standard picture hooks
- For heavier signs, locate a wall stud before drilling
- Use two mounting points whenever possible to prevent tilting or falling
- Check that all hanging hardware is fully recessed or covered so there are no sharp edges exposed
Safe installation and regular maintenance ensure wood signs remain beautiful and child-safe for the long term.
For ongoing care, wood responds well to simple routines. Dust the sign weekly with a soft, dry cloth. Avoid damp cloths or cleaning sprays, which can lift paint or warp the wood over time. If the finish starts to dull, a light coat of clear wax or furniture polish (non-toxic, of course) can restore the sheen.
Also inspect the sign every few months. Check that wall anchors haven’t loosened, that painted surfaces haven’t chipped into sharp edges, and that any decorative attachments like small wooden animals or stars are still firmly secured. For detailed advice on hanging methods, safe nursery sign hanging covers the specifics. If you prefer a no-drill option, wood cutout shelf options let you display the sign on a shelf instead of mounting it directly to the wall.
A practical perspective on personalization: what most parents overlook
Here’s something we’ve noticed after working with thousands of nursery projects: most parents spend 90% of their energy choosing how a sign looks and almost none thinking about how it will work over time.
The visual decision is easy. The harder questions are the ones nobody asks. Will this sign still feel right when your child is five? Is the mounting method genuinely secure, or just good enough? Can the piece be repurposed if you redecorate?
Our honest advice: choose simple, classic designs over highly themed ones. A script name in natural wood will outlast a trend-specific sign by years. It can move from the nursery to a bedroom door, sit on a bookshelf, or become a keepsake in a memory box. Themed signs are beautiful, but they often feel dated faster than parents expect.
Personalization should add long-term value, not just short-term charm. If you want more on personalized signs and how to think about them beyond the nursery stage, that resource is worth your time.
Find or create your perfect baby name wood cutout
Ready to take the next step? At Crawoo, we specialize in custom wooden decor built specifically for nurseries, and we know that every family’s vision is different.
Whether you want a custom wooden nursery sign with your baby’s name in a classic script, a round nursery name sign for a boho-inspired room, or something more adventurous like ocean nursery decor with a personalized nautical theme, we have options that are made to order and built to last. Browse our designs, see real customer examples for inspiration, and find the piece that makes your nursery feel complete.
Frequently asked questions
How long does it take to make a DIY baby name wood cutout?
Most DIY wooden name cutouts take 4 to 6 hours from design to finished sign, covering cutting, painting, and sealing.
What is the average cost of a baby name wood cutout?
DIY materials range from $15 to $100 depending on complexity, while pre-made custom signs vary based on size, finish, and seller.
Are baby name wood cutouts safe for nursery walls?
Yes, when securely mounted with proper anchors and finished with non-toxic sealants, they are safe and suitable for nursery use.
Can I customize the colors and fonts of a baby name wood cutout?
Absolutely. Most options allow full customization of colors, fonts, and themes, whether you’re painting or using Cricut vinyl for the lettering.
Recommended
Subscribe to Our Newsletter
Leave a comment