


The first year with your baby brings a whirlwind of emotions and the urge to create spaces that feel just right. Designing a personalized nursery sign can turn a simple room in your American home into a haven that celebrates new life and cherished memories. By focusing on nursery-safe paints and careful wood preparation, you ensure your decor is not only gorgeous but safe and meaningful for your baby’s arrival.
Table of Contents
- Step 1: Prepare the Wooden Nursery Sign for Painting
- Step 2: Choose and Apply Nursery-Friendly Paint Colors
- Step 3: Add Personalized Designs and Lettering
- Step 4: Seal and Protect Your Painted Nursery Sign
- Step 5: Inspect and Display Your Custom Nursery Sign
Quick Summary
| Key Point | Explanation |
|---|---|
| 1. Prepare the wood properly | Inspect for dust, sand the surface, and apply primer to ensure paint adheres effectively. |
| 2. Choose low-VOC paint | Use low-VOC or non-toxic paint to maintain air quality and ensure safety for your baby. |
| 3. Personalize with care | Plan your design layout and use quality brushes for lettering to achieve a polished look. |
| 4. Seal for protection | Apply a water-based sealer to protect your painted sign from damage while ensuring safety. |
| 5. Inspect before hanging | Check for paint quality, sealer curing, and secure hardware before displaying your sign. |
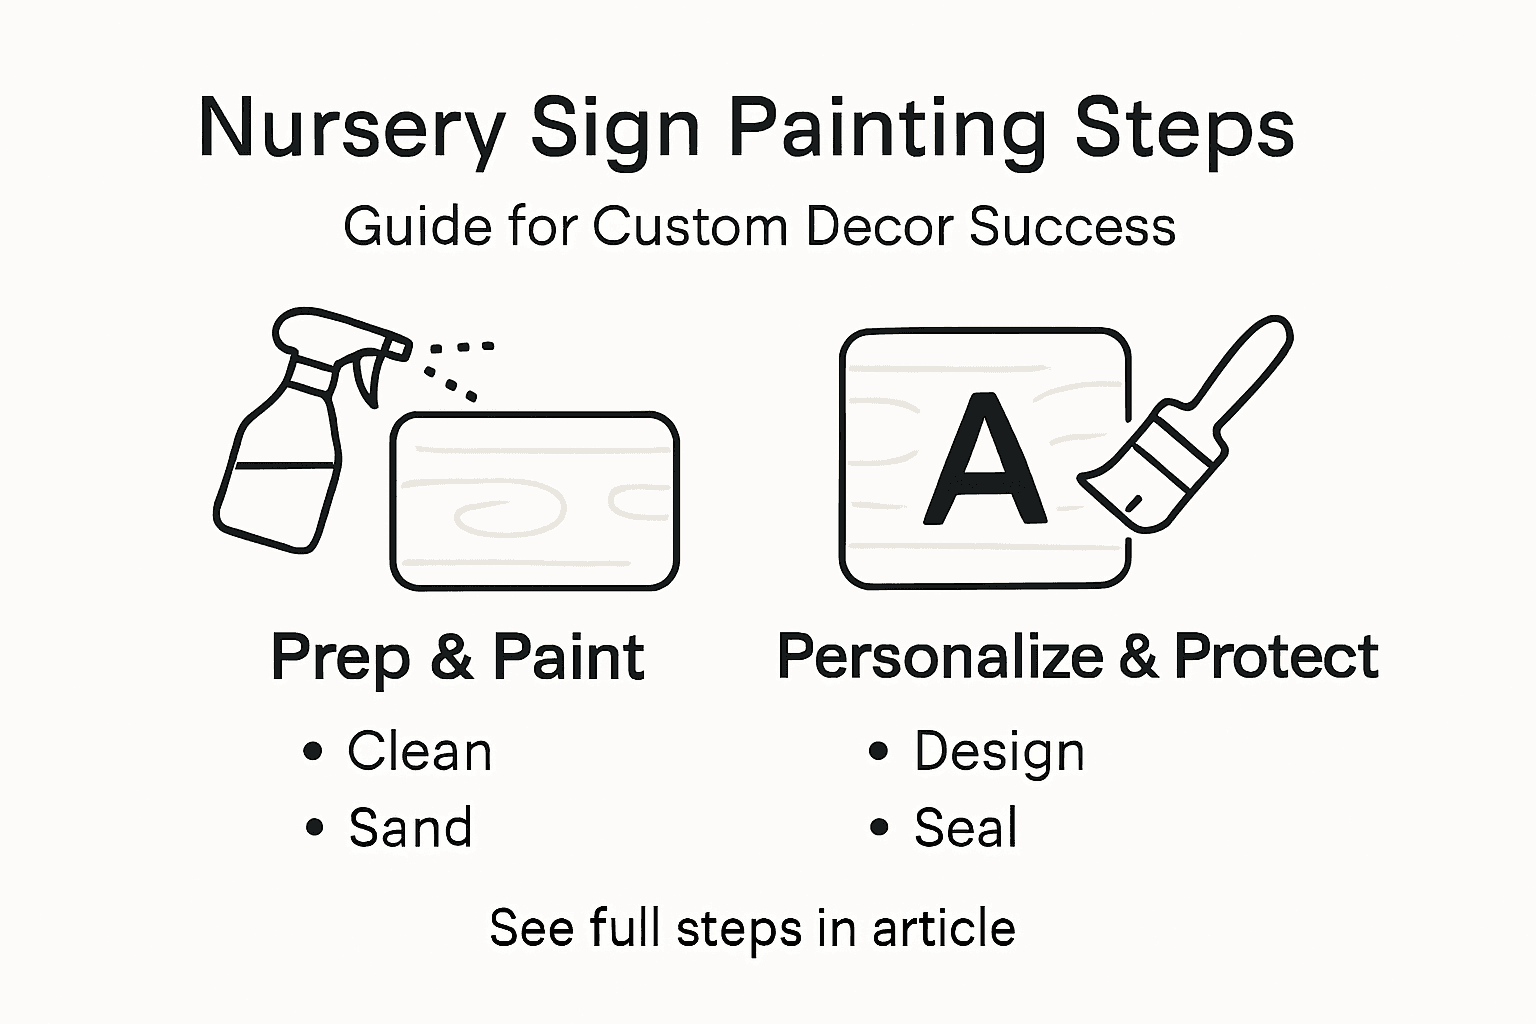
Step 1: Prepare the Wooden Nursery Sign for Painting
Before you pick up a paintbrush, your wooden nursery sign needs proper preparation. This step determines whether your paint adheres smoothly, lasts through years of nursery memories, and looks professionally finished. Taking 30 minutes now saves frustration later.
Start by inspecting your wooden sign for dust, debris, or any surface imperfections. Use a clean, dry cloth or soft brush to remove loose particles. Pay special attention to corners, edges, and any carved details where dust accumulates.
Next comes sanding the surface. Use medium-grit sandpaper (120-150 grit) to gently sand the entire sign in the direction of the wood grain. This smooths the surface and helps your paint grip better. Sand lightly, especially on edges, to avoid over-roughing delicate areas.
After sanding, wipe down the sign again with a slightly damp cloth to capture all the dust. Let it dry completely, ideally for 30 minutes to an hour. Any moisture remaining can cause paint adhesion problems.
Here’s where primer becomes your secret weapon. Primer prevents wood from absorbing paint) unevenly while also enhancing adhesion and durability. Apply one thin, even coat of wood primer using a brush or roller. Primer creates a consistent binding layer that ensures your paint color appears vibrant and uniform. Allow the primer to dry according to manufacturer instructions, usually 1-2 hours.
Consider these preparation essentials:
- Gather supplies: sandpaper, clean cloths, primer, and paintbrushes
- Work in a well-ventilated space or outdoors
- Use painter’s tape on any areas you want to protect from primer
- Sand again lightly between primer and paint for optimal results
Your sign is now ready for that first coat of color. The preparation work you’ve done creates the foundation for a nursery sign that looks beautiful for years.
Pro tip: Use a tack cloth (sticky cloth designed for dust removal) after sanding and between coats to capture fine dust particles that would otherwise create bumpy paint texture.
Step 2: Choose and Apply Nursery-Friendly Paint Colors
Selecting the right paint color involves more than aesthetics. You’re choosing a product that will surround your baby every day, so safety and air quality matter as much as beauty. The good news is that nursery-friendly options now come in gorgeous colors that create the perfect environment.
Start by choosing low-VOC or non-toxic paint. Low-VOC paints eliminate harmful emissions that could affect your infant’s developing lungs and overall health. Water-based paints are your safest bet, offering easy cleanup while maintaining excellent coverage and durability. Look for certifications like Greenguard or low-VOC labels on paint cans.
Consider your color goals before deciding on a shade. Soft pastels like pale sage, soft blue, warm cream, or gentle pink create a calming atmosphere that promotes restful sleep. If you prefer stimulating colors that encourage development, primary shades work beautifully while still being gentle on infant eyes.
Here’s how to apply paint effectively:
- Apply the first coat using smooth, even strokes with a quality brush or roller
- Follow the primer’s drying time before applying your first paint coat, typically 1-2 hours
- Apply a second coat for full color coverage and professional appearance
- Allow 24 hours of drying time before moving the sign into the nursery
Remember that water-based paints dry quickly and are easy to clean up with soap and water. This matters when you’re working with a small child in the house. You can reapply coats faster and worry less about toxic fumes lingering in your space.
Here’s a quick reference comparing common paint types for nursery signs:
| Paint Type | Safety Level | Cleanup Method | Coverage Quality |
|---|---|---|---|
| Water-based | Low-VOC, baby-safe | Soap and water | Smooth and even |
| Acrylic | Usually low odor | Soap and water | Bright, vivid color |
| Oil-based | High VOC, avoid | Solvents required | Durable but strong odor |
| Chalk paint | Low-VOC available | Soap and water | Matte, trendy finish |
Soft, calming colors paired with low-VOC paint create a nursery that is both beautiful and safe for your baby’s sensitive respiratory system.
As you apply your chosen color, think about how it will look with your nursery’s lighting and furniture. The same shade appears different in morning light versus evening, so step back frequently and assess the overall effect.
Pro tip: Use a paint roller for large flat areas and a quality brush for edges and details; this combination gives you smooth, professional coverage faster than brushwork alone.
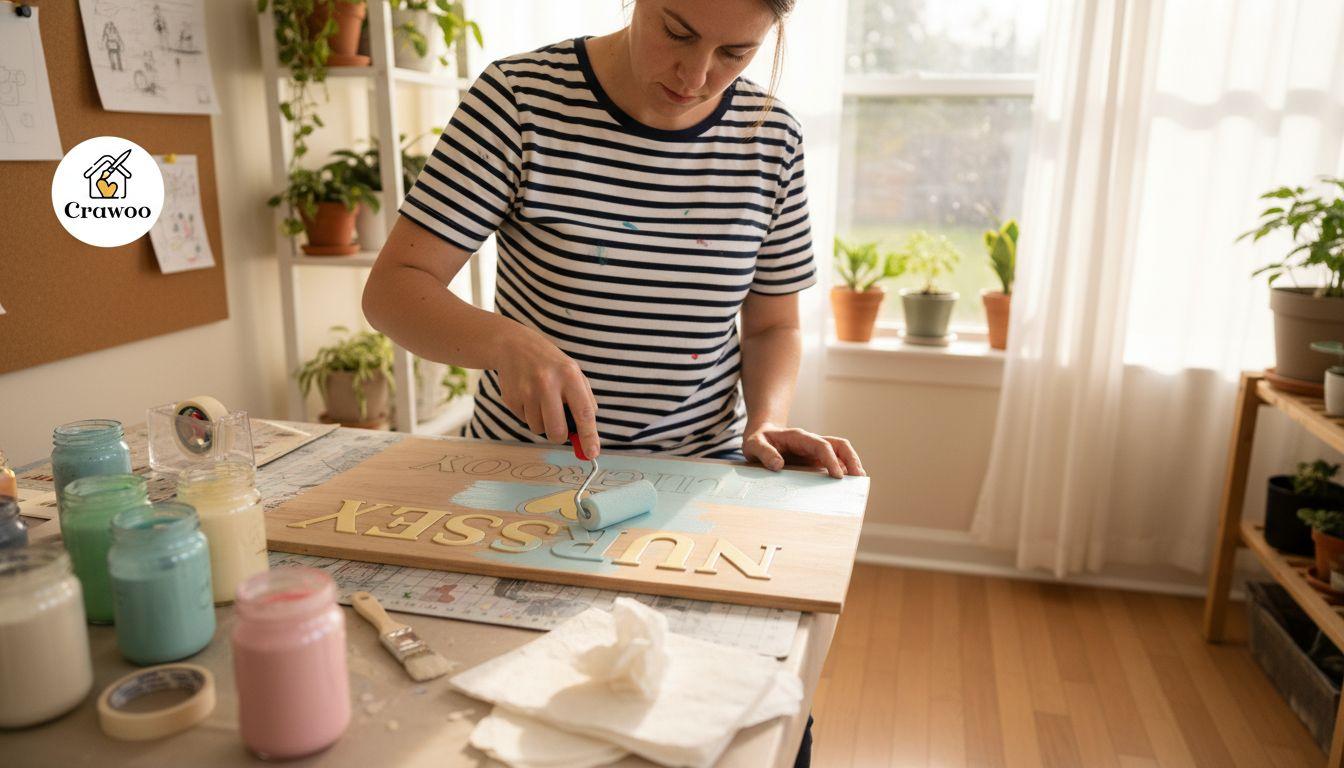
Step 3: Add Personalized Designs and Lettering
This is where your nursery sign becomes truly special. Adding your baby’s name, a meaningful date, or a cherished design transforms a wooden blank into a keepsake. The right technique ensures your lettering looks polished and lasts for years.
Start by planning your design layout. Sketch your lettering or design lightly with a pencil on the painted sign, leaving adequate spacing around edges. Effective sign painting techniques rely on proper layout and stroke control to create professional-looking results. Center your design or position it intentionally based on your overall aesthetic vision.
Choose the right brush for lettering work. Smaller, angled brushes work best for detailed lettering, while thicker brushes handle larger block letters quickly. Quality matters here because cheap brushes shed bristles that ruin your design. Invest in brushes specifically designed for painting if this is important to you.
Follow these lettering steps for clean results:
- Thin your paint slightly with water to reach a smooth, paintable consistency
- Load your brush with paint and practice your stroke on scrap paper first
- Paint letters with steady, confident strokes following your pencil guidelines
- Allow 24 hours between paint layers if adding multiple colors or details
- Apply a second coat if letters appear translucent or uneven
Consider adding simple decorative elements like small stars, moons, or botanical designs around lettering. Detailed embellishments on wooden signs create visual interest and celebrate your baby’s arrival beautifully. Dots, swirls, and simple flourishes can be added with a toothpick dipped in contrasting paint if you want easy, charming details.
Personalized lettering transforms a nursery sign from decoration into a treasured memento your child will appreciate for years.
Take your time with this step. Rushing through lettering shows, but careful work creates that handcrafted charm that makes nursery signs so meaningful.
Pro tip: Use painter’s tape to create crisp borders around lettering areas, giving you clean edges even if your brush control isn’t perfect yet.
Step 4: Seal and Protect Your Painted Nursery Sign
Your painted sign now needs protection. A protective topcoat guards against dust, moisture, and everyday wear while making your sign easier to clean. This final step ensures your custom nursery decor stays beautiful for years.
Choose the right sealer for your sign. Water-based polyurethane or water-based sealers work best for nursery items since they’re low-VOC and safe around infants. Protective topcoats safeguard painted wood) from environmental damage and moisture penetration. Avoid oil-based sealers in the nursery, as they emit stronger odors and take longer to cure.
Before sealing, ensure your paint is completely dry. Most acrylic paints need at least 24 hours of curing time before applying a topcoat. If you rush this step, the sealer can trap wet paint underneath, ruining your work.
Apply sealer following these steps:
- Stir your sealer thoroughly but gently to avoid creating bubbles
- Use a quality brush or foam roller for smooth, even application
- Apply thin coats rather than one thick coat to prevent drips
- Allow each coat to dry completely before applying another
- Most signs need only one or two sealer coats for adequate protection
Wait at least 48 hours before placing your sign in the nursery. This allows the sealer to cure fully and any fumes to dissipate. The longer curing time creates a harder, more durable finish that protects your artwork.
A sealed nursery sign maintains its beauty through spills, dust, and the occasional curious toddler hand.
Your handcrafted sign is now ready to become a treasured part of your baby’s nursery. The combination of quality paint, careful application, and proper sealing creates a keepsake that celebrates your child’s arrival.
Pro tip: Store your finished sign flat for the first week after sealing to allow the topcoat to cure evenly without any pooling or uneven drying.
Step 5: Inspect and Display Your Custom Nursery Sign
Your sign is nearly complete. Before hanging it proudly, take time to inspect your work and plan the perfect display location. This final step ensures your custom creation looks flawless and stays secure in your baby’s nursery.
Start with a thorough quality inspection. Look for uniform paint coverage, smooth finishes, and any drips or imperfections you might have missed. Proper inspection after painting ensures the sign meets professional standards before display. Hold it under different lighting angles to catch any inconsistencies that might not be visible in one light source.
Check that your sealer is fully cured. Wait the full 48 hours recommended before hanging, even if the surface feels dry. The curing process continues beneath the surface, and rushing this step can damage your finish when you handle the sign.
Consider these inspection checkpoints:
- Run your fingers gently across the surface for rough spots
- Examine lettering for crisp edges and even color coverage
- Check corners and edges for drips or uneven sealing
- Verify that paint adhesion is complete by gently scratching a hidden area
Choose the ideal display location in your nursery. Mount your sign at eye level when you’re standing, approximately 48 to 60 inches from the floor. Secure mounting practices for wooden signs ensure your custom decor stays safely in place. Avoid placing it directly above the crib or in locations where it could fall and cause injury.
Use quality hanging hardware rated for the sign’s weight. Picture hooks, wall anchors, or mounting brackets work well depending on your wall type. Make sure hardware is secure and the sign hangs level.
Review this summary before displaying your finished nursery sign:
| Inspection Area | Why It Matters | What to Check for |
|---|---|---|
| Paint Surface | Ensures professional appearance | Smoothness, no drips or bumps |
| Lettering | Maintains personal touch | Crisp edges, clear color |
| Sealer Curing | Protects against damage | Fully dry, no tackiness |
| Hanging Hardware | Keeps sign secure and safe | Proper weight rating, level mount |
A beautifully displayed nursery sign becomes the focal point that welcomes your baby into a space filled with love and intention.
Step back and admire your handcrafted creation. You’ve transformed a wooden blank into a personalized keepsake that celebrates your baby’s arrival.
Pro tip: Take photos of your finished sign before hanging it, creating a record of your handiwork that you can treasure and share with family.
Elevate Your Nursery Decor with Custom Wooden Signs from Crawoo
Creating a beautifully painted wooden nursery sign can be challenging when you want long-lasting quality, safe materials, and a personalized touch that truly celebrates your baby. Whether you are worried about paint adherence, choosing nursery-safe colors, or adding flawless lettering, starting with a premium wooden base makes all the difference. At Crawoo, we solve these challenges by offering expertly crafted wooden name signs that are ready for your creative painting and finishing touches.

Explore our Buy Wooden Name Signs for Nursery: Enjoy the Best Quality on Crawoo… collection where every piece is designed to provide a smooth surface ideal for primer and paint. Our custom wooden decor gives you the perfect canvas for personalized designs that endure daily wear and safe finishing, making your nursery truly special. Shop now at Crawoo.com to start your project with confidence and create a lasting keepsake for your child.
Frequently Asked Questions
How do I prepare a wooden nursery sign for painting?
Start by cleaning the sign to remove dust and debris, then sand the surface lightly to promote paint adhesion. After sanding, wipe it down with a damp cloth and let it dry completely before applying a primer for best results.
What type of paint is best for a nursery sign?
Choose low-VOC or non-toxic water-based paint for your nursery sign to ensure safety for your child. This type of paint provides excellent coverage and is easy to clean up, making it ideal for a home with infants.
How can I add personalized designs or lettering to my sign?
Plan your design layout by sketching lightly with a pencil on the sign’s surface. Then, use a quality brush to paint the letters, applying thin coats and allowing adequate drying time between layers for a professional finish.
What sealant should I use for my painted nursery sign?
Use a water-based polyurethane or sealer, as these options are low-VOC and safe for nurseries. Apply thin coats for effective protection against dust and moisture, and allow each coat to dry completely before adding another.
How do I ensure my nursery sign is securely displayed?
Inspect your sign for imperfections and wait for the sealer to cure completely before hanging. Use appropriate hanging hardware suited for the sign’s weight and secure it at eye level for the best visual impact in the nursery.
What steps should I take if I notice imperfections on my finished sign?
If you find drips or rough spots, sand them down gently with fine-grit sandpaper once the paint is fully dried. Then, touch up the affected areas with paint or a sealer to achieve a smooth and flawless finish.
Recommended
Subscribe to Our Newsletter
Leave a comment