


Creating a personalized nursery for your baby is exciting, but hanging wooden signs safely requires careful planning. Many parents worry about heavy decor falling near their child’s sleeping area or damaging walls with improper installation. This guide walks you through selecting the right wood, preparing your sign, mounting it securely with proper anchors, and maintaining safety as your baby grows. You’ll learn practical techniques for creating beautiful nursery decor that stays secure and child-safe throughout the toddler years.
Table of Contents
- Choosing The Right Wood And Preparing Your Sign
- Creating Your Design: Stencil And Paint Techniques
- Safely Mounting Your Wooden Nursery Sign
- Finishing Touches And Ongoing Safety Checks
- Explore Beautiful Wooden Nursery Signs At Crawoo
- Frequently Asked Questions
Key takeaways
| Point | Details |
|---|---|
| Wood selection matters | Cedar resists decay naturally while pine offers smooth grain perfect for painting |
| Surface prep is critical | Sanding from coarse to fine grit ensures paint adhesion and professional finish |
| Proper anchors prevent falls | Wall stud mounting with heavy-duty hooks reduces falling incidents by 95% |
| Food-safe finishes protect babies | Mineral oil and non-toxic sealers keep wooden decor baby-safe |
| Regular safety checks required | Reassess mounting security when babies start crawling around 8-10 months |
Choosing the right wood and preparing your sign
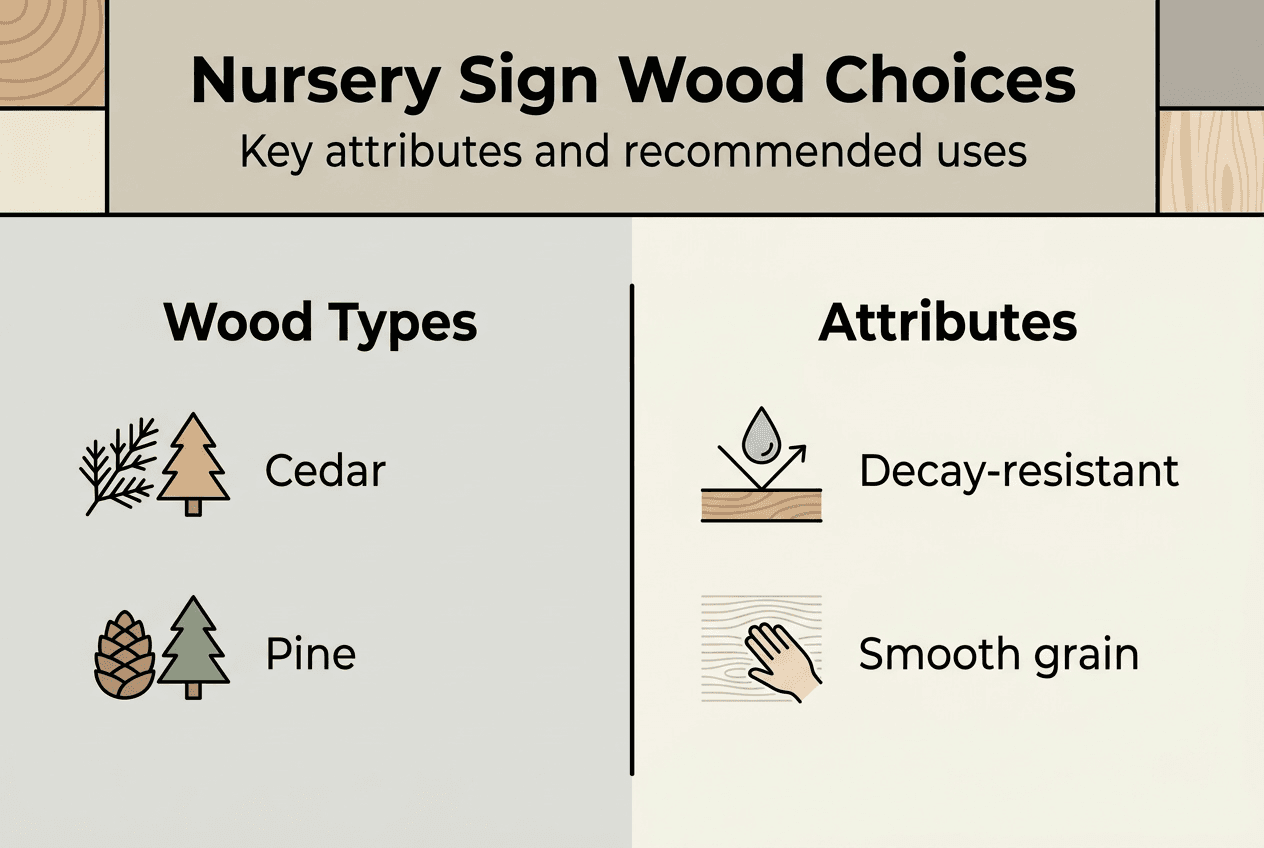
Selecting appropriate wood sets the foundation for a durable, beautiful nursery sign. Cedar is naturally resistant to decay, while pine is ideal for painting due to its smooth grain. Cedar works beautifully for natural finishes and outdoor-inspired nursery themes, maintaining its appearance without heavy sealing. Pine accepts paint evenly and costs less, making it perfect for colorful designs and personalized name signs.
Before starting your project, gather sandpaper in multiple grits (80, 120, 220), tack cloth, painter’s tape, and your chosen wood piece. Begin sanding with 80-grit sandpaper to remove rough spots and splinters. Progress to 120-grit for smoothing the surface, then finish with 220-grit for a silky texture that accepts paint beautifully. This gradual progression prevents scratches and creates ideal paint adhesion.
Pro Tip: Run your hand across the wood after each sanding stage. If you feel any roughness, continue with that grit before moving finer. This tactile check catches problem areas better than visual inspection alone.
Wipe away all dust with a tack cloth between sanding stages. Dust particles trapped under paint create bumps and uneven coverage. Understanding wood signage terminology nurseries helps you communicate clearly when purchasing materials or seeking advice from hardware store staff.
| Wood Type | Key Attributes | Best Uses | | — | — | | Cedar | Decay-resistant, natural oils, pleasant aroma | Natural finishes, rustic themes, minimal painting | | Pine | Smooth grain, affordable, readily available | Painted signs, detailed designs, budget projects | | Birch | Fine grain, very smooth, durable | Intricate designs, professional finish, staining |
The wood you choose affects both your working process and final appearance. Cedar requires less finishing but shows paint unevenly. Pine demands proper sealing but delivers crisp, clean painted letters. Consider your design vision and skill level when selecting materials.
Creating your design: stencil and paint techniques
Transforming plain wood into personalized nursery art requires careful design application. A stencil created with a die-cut machine and paint applied with foam pouncers minimizes bleeding but may still allow slight bleed-through. This method works exceptionally well for names, animals, and simple shapes.
Follow these steps for crisp stencil application:
- Design your pattern using software compatible with your die-cut machine (Silhouette, Cricut)
- Cut the stencil from adhesive vinyl for secure wood contact
- Apply the stencil firmly, pressing edges down to prevent paint seepage
- Load foam pouncer with minimal paint, dabbing excess on paper towel
- Apply paint using gentle bouncing motions rather than brushing
- Remove stencil immediately while paint is wet to prevent peeling
Intricate letters with thin sections or small interior spaces challenge even experienced crafters. The letter A’s triangle center or B’s curves often show slight bleeding. Reduce this by applying paint in thin layers, building opacity gradually rather than one thick coat.
Alternative methods suit different skill levels and available tools. Sticker paper printed with your design creates instant stencils without cutting machines. Pencil transfer using newspaper and tracing works for hand-drawn designs. Wax paper technique involves drawing your design, flipping it onto wood, and tracing to transfer graphite.
Pro Tip: Sand lightly with 220-grit between paint coats. This removes any raised grain and creates an ultra-smooth finish. After final painting, another gentle sanding softens edges for a professional look.
Experiment with create wooden sign techniques on scrap wood before tackling your final piece. This practice run reveals how your chosen wood accepts paint and helps you perfect pouncing pressure.
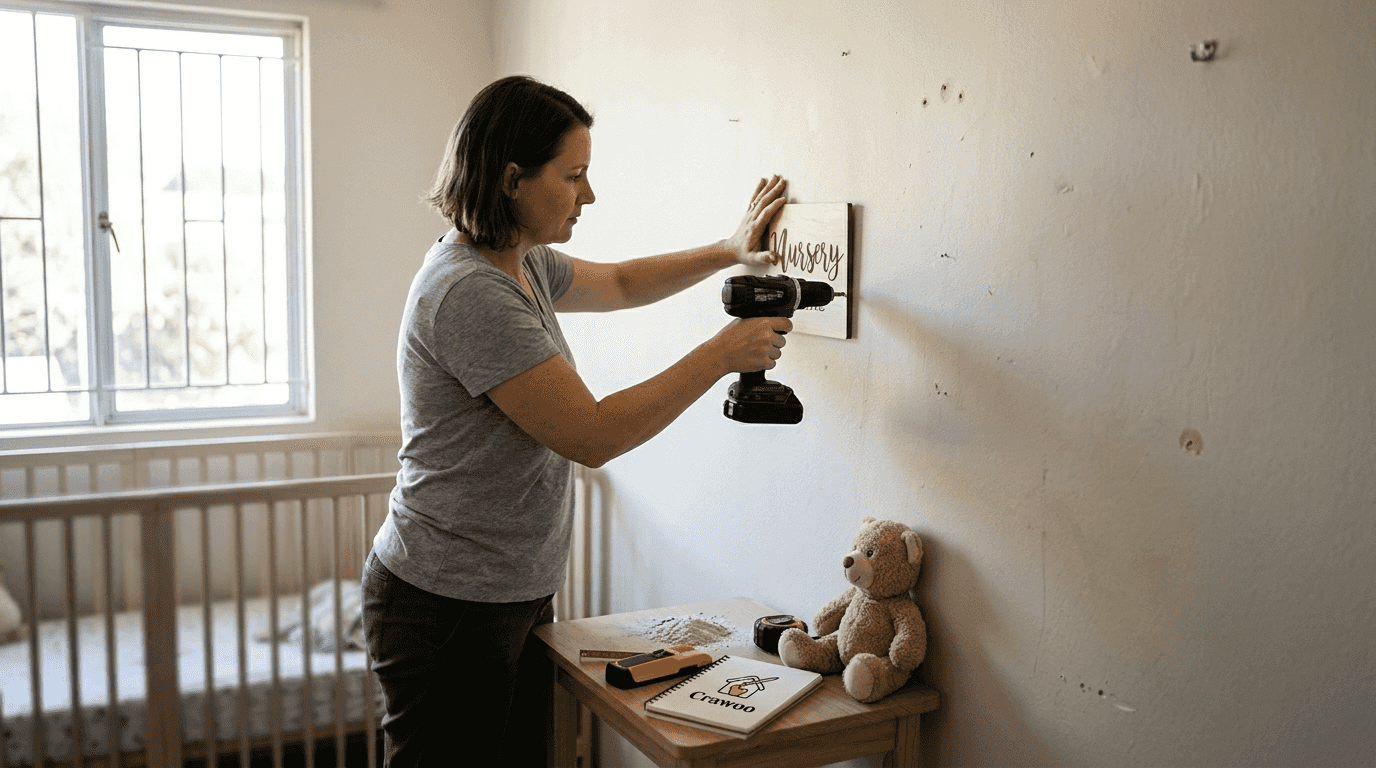
Safely mounting your wooden nursery sign
Secure installation protects your child from falling decor hazards. Properly installed wooden nursery signs with appropriate anchors reduce falling incidents by 95%. This dramatic safety improvement comes from understanding wall types, selecting correct hardware, and mounting at appropriate heights.
Heavy-duty picture hooks anchored into wall studs are essential for securing wooden signs. Wall studs provide solid wood backing that holds screws firmly, unlike drywall alone. Locate studs using an electronic stud finder or by tapping the wall and listening for solid sounds versus hollow echoes.
| Anchor Type | Wall Material | Weight Capacity | Installation Difficulty |
|---|---|---|---|
| Wood screw into stud | Drywall with stud | 50+ pounds | Easy with stud finder |
| Toggle bolt | Hollow drywall | 20-30 pounds | Moderate, requires larger hole |
| Plastic expansion anchor | Drywall | 10-15 pounds | Easy but limited capacity |
| Masonry anchor | Brick or concrete | 75+ pounds | Difficult, requires special drill bit |
Position your sign at least 3 feet above the crib mattress and away from areas where curious toddlers can reach while standing. Babies develop surprising climbing abilities around 8-10 months, making previously safe heights accessible. Choose hooks rated for double your sign’s actual weight as a safety margin.
Follow these safety guidelines:
- Verify anchor type matches your wall material before installation
- Use two mounting points minimum for signs wider than 12 inches
- Apply museum putty to bottom corners preventing tipping if bumped
- Keep signs away from window treatments that children might use for climbing
- Install above changing tables or dressers at heights preventing grabbing
Pro Tip: Test your installation by gently pulling the sign forward and sideways. Proper mounting shows zero movement. Any shifting indicates inadequate anchoring requiring immediate correction.
Falling nursery decor poses serious injury risks, especially above sleeping areas. Even lightweight wooden signs become dangerous projectiles when improperly mounted, making secure installation non-negotiable for child safety.
Reassess your custom wooden nursery sign placement as developmental milestones arrive. What seemed safely out of reach for a newborn becomes accessible once pulling up and cruising begin.
Finishing touches and ongoing safety checks
Protecting your wooden sign with safe finishes ensures durability without chemical exposure risks. Wooden pieces finished with food-safe mineral oil are safest for nursery decor. Mineral oil penetrates wood fibers, enhancing grain beauty while creating a protective barrier against moisture and handling.
Apply mineral oil with a clean cloth, rubbing in the direction of the wood grain. Allow 20 minutes for absorption, then wipe away excess. Reapply monthly for the first three months, then every six months for ongoing protection. This simple maintenance keeps wood looking fresh and prevents drying or cracking.
Avoid polyurethane, varnish, or spray sealers containing volatile organic compounds in nursery spaces. These finishes release fumes during curing and may contain chemicals unsafe for infant exposure. Even after full curing, some products continue off-gassing at low levels. Natural alternatives like beeswax mixed with mineral oil provide protection without toxicity concerns.
Understanding wooden nursery decor safe natural solutions 2026 standards helps you make informed finishing choices. Current safety guidelines emphasize zero-VOC products and food-grade materials for items within infant reach.
Regular safety inspections prevent accidents as your baby develops new abilities:
- Check mounting hardware monthly for loosening from wall settling or vibration
- Examine wood for cracks or splitting that could create sharp edges
- Verify paint adhesion, watching for peeling that creates choking hazards
- Assess whether current mounting height remains out of reach
- Remove or relocate signs if baby shows interest in grabbing or pulling
Babies transition from stationary newborns to mobile explorers rapidly. What hung safely above a bassinet becomes accessible once standing and cruising begin. Watch for signs your child notices the sign, reaches toward it, or attempts climbing nearby furniture for access. These behaviors signal time for remounting higher or temporary removal.
Maintaining nursery wall decor safety requires ongoing attention rather than one-time installation. Schedule quarterly reviews of all mounted items, checking both physical condition and appropriateness for your child’s current developmental stage. This proactive approach prevents accidents while preserving your carefully created personalized decor.
Explore beautiful wooden nursery signs at Crawoo
Creating DIY nursery signs builds special memories, but sometimes you want professionally crafted pieces combining safety and artistry. Crawoo’s wooden sign collection features hand-selected designs created with baby-safe materials and expert craftsmanship. Each piece undergoes quality inspection ensuring smooth finishes, secure construction, and non-toxic treatments.

Personalization options let you customize names, colors, and themes matching your nursery vision perfectly. Whether you prefer minimalist modern designs or whimsical woodland creatures, Crawoo offers styles complementing any decor approach. Browse the custom wooden nursery sign options or explore unique wood wall art for inspiration. Professional designs eliminate concerns about paint bleeding, uneven finishes, or structural integrity while delivering heirloom-quality pieces.
Frequently asked questions
What wood is best for a wooden nursery sign?
Cedar and pine both create excellent nursery signs with different advantages. Cedar naturally resists decay and moisture, making it ideal for humid climates or minimal-finish projects. Pine offers smooth grain accepting paint beautifully, perfect for colorful personalized names and detailed designs.
How do I prevent paint from bleeding under my stencil?
Use adhesive vinyl stencils pressed firmly against sanded wood, applying paint with foam pouncers in thin layers. Dab excess paint before application and use bouncing motions rather than brushing. Remove stencils while paint remains wet to prevent edge peeling.
What type of finish is safe for baby nursery wood signs?
Food-safe mineral oil provides the safest finish for nursery wooden decor. It penetrates wood without toxic fumes or chemical residue. Avoid polyurethane, spray sealers, and varnishes containing volatile organic compounds that continue off-gassing after application.
How do I hang a wooden sign safely in a nursery?
Use heavy-duty picture hooks anchored into wall studs for maximum security. Position signs at least 3 feet above the crib and out of reach from standing toddlers. Select hooks rated for double the sign’s weight and verify zero movement after installation by gentle pull testing.
When should I remove or relocate nursery wall decor?
Reassess mounting safety when babies begin pulling up and cruising, typically around 8-10 months. Remove or relocate signs if your child shows interest in reaching for them, attempts climbing nearby furniture for access, or if mounting hardware shows any loosening. Regular monthly inspections catch potential hazards early.
Recommended
Subscribe to Our Newsletter
Leave a comment