


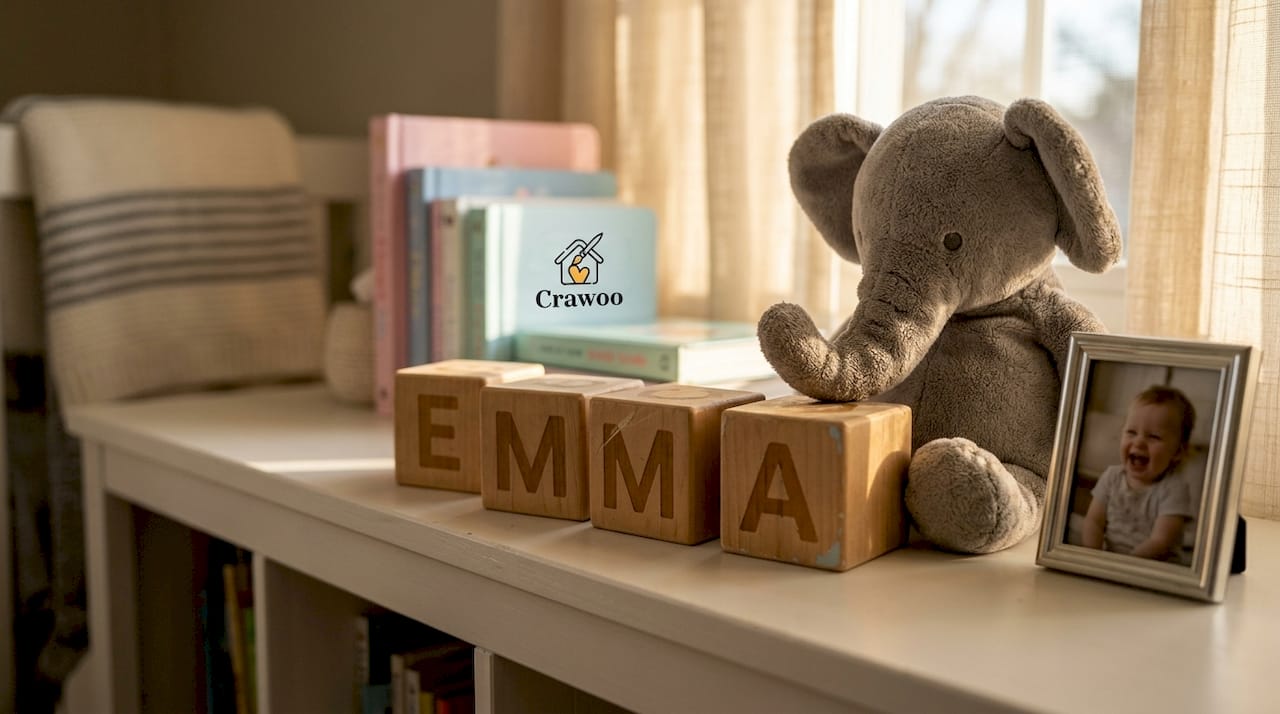
Custom nursery decor can cost a small fortune, especially when you want something that spells out your baby’s name in a way that feels truly yours. Pre-made personalized wooden blocks often run $8 to $15 per block, meaning a five-letter name could set you back $75 or more. The good news is that making your own costs a fraction of that price, and the results look just as polished. This guide walks you through every step of the process, from picking the right wood to sealing the finished blocks safely, so you can create something beautiful and baby-safe without the sticker shock.
Table of Contents
- Gathering your materials and safety essentials
- Step-by-step: Creating your personalized wooden blocks
- Decoration ideas and creative variations
- Caring for and displaying your finished blocks
- A fresh perspective: Why DIY nursery decor means more than just savings
- Bring your nursery vision to life with ready-made options
- Frequently asked questions
Key Takeaways
| Point | Details |
|---|---|
| Safe materials matter | Choose non-toxic, toy-safe paints and sealants for blocks your child will touch and play with. |
| DIY saves money | Personalized wooden blocks are much more affordable when you make them yourself, especially for longer names. |
| Step-by-step ensures success | Carefully following each step—from sanding to sealing—yields professional, child-safe results. |
| Creativity adds personal touch | You can make your blocks unique with creative themes, colors, and display ideas. |
| Display and maintenance count | Proper care and storage help keep your finished blocks beautiful and durable for years. |
Gathering your materials and safety essentials
Before you cut, paint, or stick anything, you need the right supplies on hand. Skipping this step is how you end up mid-project with the wrong paint or blocks that are too small to work with. Getting organized first saves you time, frustration, and extra trips to the craft store.
For the blocks themselves, unfinished pine cubes around 65mm (roughly 2.5 inches) are the sweet spot. They are large enough to display letters clearly, small enough to sit neatly on a nursery shelf, and light enough for little hands once your toddler grows into them. You can find them at craft stores like Michaels or Hobby Lobby, or order in bulk online for better pricing.
The personalized wooden blocks DIY method that works best uses unfinished wooden cubes, non-toxic paints, stickers, and sealant for both personalization and safety. That combination is important. Not all craft paints are safe for items that end up near babies. Look for paints labeled “non-toxic” and “AP certified” (AP stands for Approved Product, a safety standard from the Art and Creative Materials Institute).
Here is a quick cost comparison to show why DIY makes sense:
| Option | Cost for 6 blocks | Cost for 10 blocks |
|---|---|---|
| Pre-made custom blocks | $60 to $90 | $100 to $150 |
| DIY materials (first time) | $18 to $25 | $20 to $28 |
| DIY materials (repeat project) | $8 to $12 | $10 to $15 |
Beyond paint, you will need:
- Unfinished pine cubes (65mm recommended)
- Non-toxic, AP-certified acrylic craft paint
- Foam brushes or small flat brushes
- Alphabet stickers (the kind used for scrapbooking work perfectly)
- Fine-grit sandpaper (220 grit)
- A toy-safe sealant or mod podge labeled non-toxic
- A clean, ventilated workspace with a drop cloth
Pro Tip: Before you start painting, wipe each block with a slightly damp cloth and let it dry fully. Dust and wood particles cause paint to look bumpy and uneven, which is hard to fix once it dries.
Safety first: Always check that your sealant is fully cured before letting babies or toddlers handle the blocks. “Non-toxic when dry” is not the same as safe while wet.
If you enjoy this kind of project, pairing your blocks with a custom wooden nursery sign creates a cohesive look across the whole room. For more design inspiration before you start, the wooden name sign guide is a helpful starting point.
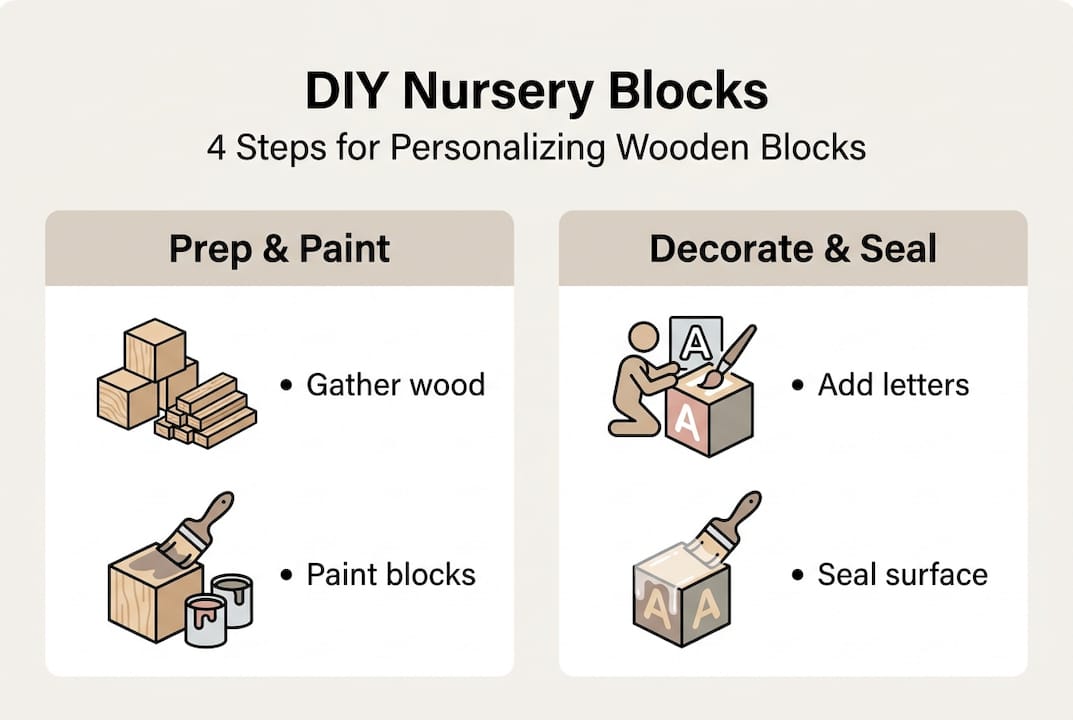
Step-by-step: Creating your personalized wooden blocks
With your supplies ready, here is a proven workflow to craft personalized blocks your child can enjoy safely.
- Sand each block lightly. Use 220-grit sandpaper to smooth any rough edges or splinters. Wipe away dust with a dry cloth.
- Apply your base coat. Paint the entire block in your chosen background color using a foam brush. Let it dry completely, then add a second coat for even coverage.
- Place your alphabet stickers. Center one letter sticker on the face of each block. Press down firmly on all edges so paint cannot bleed underneath.
- Paint over the sticker. Apply one or two coats of a contrasting color directly over the sticker. Do not worry about painting over the sticker itself.
- Let the paint dry fully. Wait at least 30 to 60 minutes before moving to the next step. Rushing this causes smearing.
- Peel the sticker carefully. Pull slowly from one corner. The paint-over-sticker technique creates crisp letter designs with clean edges that look almost professional.
- Touch up if needed. Use a fine brush to clean up any small bleeds around the letter edges.
- Apply sealant. Brush on a thin, even coat of toy-safe sealant. Let it cure for the full time listed on the label, usually 24 to 48 hours.
For more ideas on how using alphabet stickers can elevate your nursery decor, or to see how this fits into a broader DIY name plaque process, those resources break it down further.
Here is a quick comparison of the two most popular personalization methods:
| Method | Skill level | Cost | Result quality | Baby-safe |
|---|---|---|---|---|
| Sticker masking + paint | Beginner | Low | Very good | Yes, with proper sealant |
| Wood engraving | Intermediate | Medium to high | Excellent | Yes |
Pro Tip: Paint all six faces of each block before placing stickers. This way you get full color coverage without awkward bare spots on the sides your child will inevitably flip over.
Troubleshooting: If paint bleeds under your sticker, press the edges down more firmly next time, or use a slightly thicker sticker. Vinyl stickers seal better than paper ones.
Decoration ideas and creative variations
Now that you have learned the standard method, let these creative twists and finishing options make your blocks uniquely yours.
The beauty of DIY is that you are not locked into one look. Here are some ways to take your blocks further:
- Pastel color sets: Assign a different soft color to each block so the full name creates a rainbow effect on the shelf.
- Animal motifs: Paint a small animal on one face of each block alongside the letter. A simple bunny or bear outline is easy to do with a paint pen.
- Pattern faces: Use the non-letter faces for stripes, polka dots, or simple geometric shapes. This gives the blocks more visual interest from every angle.
- Decorative paper accents: Cut small shapes from scrapbook paper and mod-podge them onto a face for texture. Always seal thoroughly so paper edges do not lift and become a hazard.
- Glitter accents: A tiny bit of glitter mixed into the sealant coat adds sparkle without loose particles. Never use loose glitter on items babies handle.
Painting offers color variety for nursery decor, but it requires non-toxic materials and careful sealing at every stage. That point cannot be overstated when you are decorating for a child under three.
DIY blocks can cost up to 60% less than custom pre-made sets, especially once your baby’s name goes beyond five or six letters. That savings adds up fast when you factor in the cost of buying a matching set as a gift too.
For display, think beyond just lining blocks up in a row. You can:
- Stack them vertically for a tower effect
- Arrange them on a floating shelf alongside a framed print
- Place them inside a small wooden crate or basket for easy grab-and-go access
Mixing your handmade blocks with store-crafted pieces like wooden names on shelves creates a layered, intentional look. Browse personalized name sign ideas to see how other parents style their spaces for inspiration.
Caring for and displaying your finished blocks
With the blocks decorated, here is how to keep them looking and functioning their best through the baby and toddler years.
Wooden blocks are durable, but they need a little maintenance to stay both beautiful and safe. The good news is that properly sealed DIY blocks can last just as long as store-bought ones when you use quality materials from the start.
Here is how to care for them:
- Spot-clean only. Use a barely damp cloth to wipe surfaces. Never submerge wooden blocks in water or put them in the dishwasher.
- Re-seal when needed. If you notice the surface starting to look dull or the paint feels rough to the touch, apply a fresh thin coat of toy-safe sealant and let it cure fully before returning the blocks to your child.
- Touch up paint chips. Small chips happen. Use the original paint color to touch up, then reseal that area.
- Check for wear regularly. Run your fingers along all edges and corners. If wood starts to splinter or edges become sharp, sand lightly and reseal, or retire the block.
- Store safely when not in use. Keep blocks in a low basket or open bin so your toddler can reach them independently without pulling from a height.
Pro Tip: Rotate the blocks for different milestones and photo moments. Spell out “ONE” for a first birthday flat lay, or arrange them to say “BOY” or “GIRL” for a gender reveal keepsake. These small touches turn a simple craft into a family memory.
For a full collection of display-ready pieces that complement your blocks, browse wooden name signs for nursery to see what pairs well with your handmade set.
A fresh perspective: Why DIY nursery decor means more than just savings
Most articles about DIY nursery projects lead with the cost angle, and yes, saving 60% matters when you are outfitting a whole room. But there is something else happening when you make your child’s name blocks by hand that no price tag captures.
You are making a decision. You are choosing to spend your time, not just your money, on your child’s space. That choice shows up in the finished object in ways that are hard to explain but easy to feel. The slight variation in brushstroke, the color you picked because it matched the quilt your mother made, the afternoon you spent at the kitchen table while your baby napped. Those details are in the blocks whether anyone else sees them or not.
Handmade decor also grows with your family’s story. Parents who read about personalized wooden name signs often mention keeping them long after the nursery phase ends. The blocks become a shelf decoration in a big-kid room, then a keepsake box item, then something a teenager finds and actually smiles at.
DIY is not just a budget strategy. It is a way of putting intention into the spaces where your child first learns what home feels like.
Bring your nursery vision to life with ready-made options
Sometimes you want the personal touch without the project timeline, or you need a larger piece that goes beyond what a single DIY session can deliver. That is where professionally crafted wooden decor fills the gap perfectly.
At Crawoo, every piece is made with the same care you put into your DIY blocks. If you love the look of a handmade name display but want something polished for the wall, a round nursery name sign makes a stunning focal point. For a full room refresh, custom nursery signs let you match fonts, colors, and styles to everything you have already created. Mix your handmade blocks with a custom piece and the whole room comes together beautifully.
Frequently asked questions
What type of paint is safest for baby wooden blocks?
Always use non-toxic, AP-certified acrylic craft paints or finishes specifically labeled safe for children’s products. Look for the AP seal on the label before you buy.
How long should paint and sealant cure before my child can touch the blocks?
Let painted or sealed blocks dry for at least 24 to 48 hours, or follow the full cure time listed on the product label. “Dry to touch” and “fully cured” are not the same thing.
Is DIY really cheaper than buying custom wooden blocks?
Yes. DIY costs roughly half or less compared to pre-made custom options, and the savings grow even larger for longer names where each additional block adds to the pre-made price.
What if I don’t have stencils? Can I still personalize the blocks?
Absolutely. Alphabet stickers work as stencils when you paint over them and peel after drying, or you can use a paint pen to freehand letters and simple designs directly onto the block surface.
Recommended
Subscribe to Our Newsletter
Leave a comment