


Creating a safe, personalized nursery for your baby shouldn’t mean compromising on style or health. Many expectant and new parents struggle to find custom wooden decor that meets strict safety standards while reflecting their unique vision for a cozy space. Making your own wooden nursery decorations gives you complete control over materials, finishes, and design, ensuring every piece is both beautiful and safe for infants and toddlers. This comprehensive guide walks you through selecting the right wood, following essential safety standards, crafting step by step, and applying child-safe finishes to create stunning, personalized nursery decor that will last for years.
Table of Contents
- Choosing The Right Wood For Nursery Decor
- Essential Safety Standards For Wooden Nursery Decor
- Step-By-Step Guide To Crafting Wooden Nursery Decor
- Checking And Finishing Your Wooden Nursery Decor For Safety And Style
- Discover Unique Wooden Nursery Decor At Crawoo
- FAQ
Key takeaways
| Point | Details |
|---|---|
| Wood selection matters | Choosing hardwoods over composites reduces VOC exposure and increases durability for long-lasting nursery decor. |
| Safety standards are critical | Following CPSC guidelines on spacing, stability, and anchoring prevents entrapment and tipping hazards. |
| Child-safe finishes protect health | Low-VOC paints and plant-based sealers minimize chemical exposure while enhancing wood beauty. |
| Step-by-step crafting ensures quality | Measuring, cutting, sanding, and assembling with precision creates professional-looking personalized pieces. |
| Regular inspection maintains safety | Checking for loose parts, sharp edges, and wear keeps nursery decor safe as your child grows. |
Choosing the right wood for nursery decor
Selecting the proper wood type forms the foundation of safe, beautiful nursery decor. The choice between hardwoods and softwoods impacts not only the appearance and longevity of your pieces but also the health of your nursery environment. Understanding these differences helps you make informed decisions that balance aesthetics, budget, and safety.
Hardwoods like maple, cherry, and oak offer exceptional durability and fine grain patterns that create elegant, timeless pieces. These dense woods resist dents and scratches far better than softer alternatives, making them ideal for furniture and decor that will withstand years of use. Proper wood selection impacts both aesthetics and durability of nursery decor, particularly when you want pieces that grow with your child. Hardwoods also take stains and finishes beautifully, allowing you to achieve rich, custom colors that complement your nursery theme.
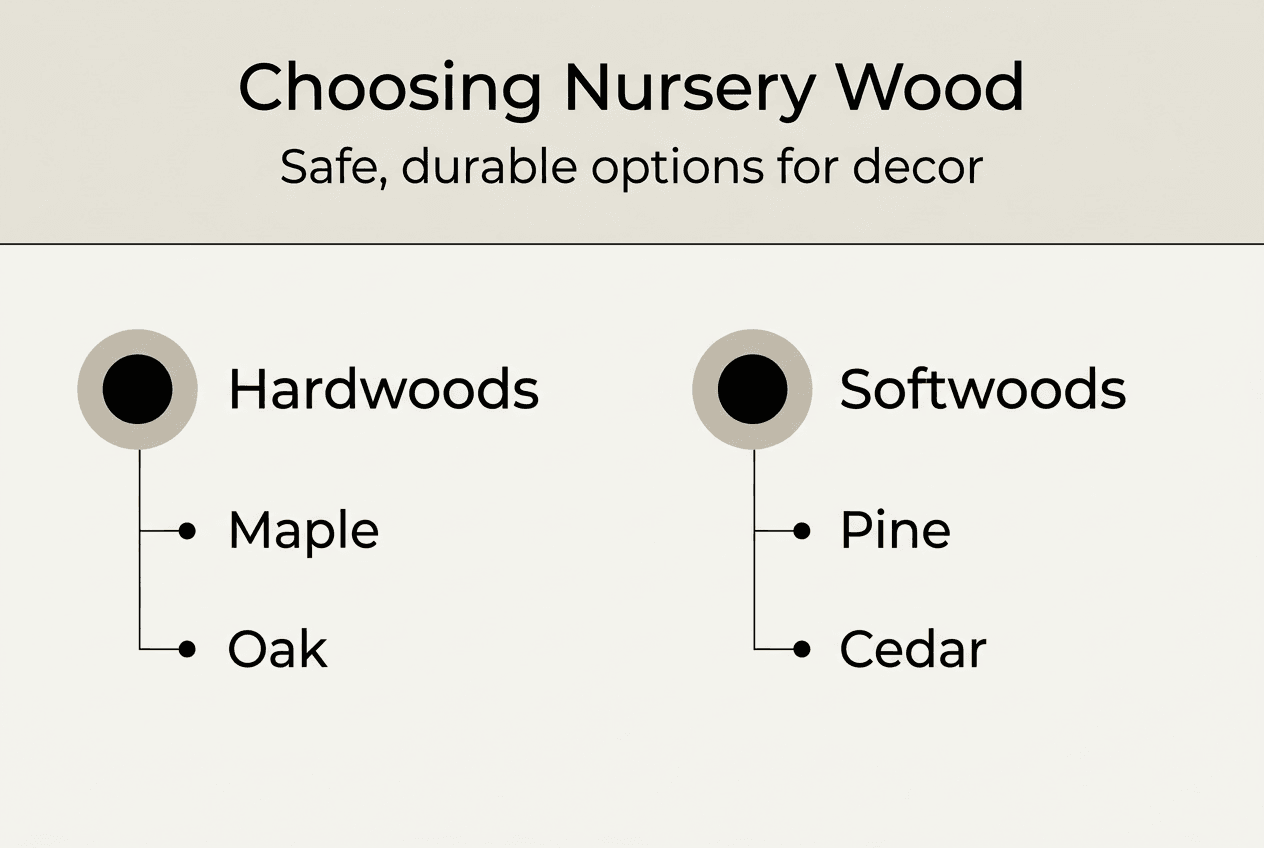
Softwoods like pine and cedar present budget-friendly options for parents starting their DIY journey. While more affordable and easier to work with basic tools, these woods are more susceptible to surface damage from impacts or pressure. Pine works well for wall art, signs, and lighter decorative pieces where durability concerns are minimal. Cedar offers natural insect-repelling properties and a pleasant aroma, though it requires careful finishing to prevent oil bleeding.
The health implications of your wood choice deserve serious consideration. Solid wood furniture emits significantly fewer harmful VOCs than composite materials like MDF or particleboard, which contain formaldehyde-based adhesives. These emissions can persist for months or years, affecting indoor air quality in your baby’s room. Choosing solid wood over engineered products creates a healthier environment from day one.
Pro Tip: Source wood from local lumber yards or specialty suppliers who can verify the wood’s origin and treatment history, ensuring you avoid chemically treated materials unsuitable for nursery use.
When selecting wood, consider these key factors:
- Grain pattern and color compatibility with your nursery design
- Weight and density for the specific project type
- Availability and cost within your budget
- Workability with your available tools and skill level
- Natural resistance to moisture and warping
Exploring safe natural wooden nursery decor options can inspire your material choices and design direction. Understanding wood decor craftsmanship nursery techniques helps you appreciate quality construction methods. Familiarizing yourself with wood signage terminology nurseries ensures you communicate effectively when sourcing materials. The variety of wooden wall art types nursery decor 2026 demonstrates the creative possibilities available with different wood selections.
Essential safety standards for wooden nursery decor
Safety transforms from an afterthought to the primary design consideration when creating decor for spaces occupied by infants and toddlers. Understanding and implementing established safety standards protects your child from preventable hazards while giving you peace of mind. These guidelines exist because of extensive research into child development and accident prevention.
The Consumer Product Safety Commission establishes strict requirements for nursery furniture and decor. Adherence to safety standards is paramount in wooden nursery decor, particularly regarding spacing and stability. Slat spacing must never exceed 2 3/8 inches to prevent head entrapment, a serious risk for curious babies who explore their environment by reaching and climbing. This measurement applies to cribs, decorative railings, and any vertical elements in your designs.
Stability prevents tipping accidents that cause thousands of emergency room visits annually. Design your pieces with a low center of gravity and wide base to resist toppling when pulled or climbed on. Heavier items like bookshelves, dressers, or large wall-mounted pieces require secure anchoring to wall studs using appropriate hardware rated for the weight. Never rely on drywall anchors alone for anything a child might grab or pull.
“Safety in nursery design means anticipating how a mobile, curious child will interact with every surface and edge as they grow from infant to active toddler.”
Surface preparation eliminates splinter hazards and sharp edges that can injure delicate skin. Sand all surfaces progressively through finer grits, finishing with 220-grit sandpaper for a smooth, touchable finish. Round over sharp corners and edges using a router with a roundover bit or careful hand sanding. Run your hand slowly over every surface, feeling for catches or rough spots that need additional attention.
Pro Tip: Test surface smoothness by running a piece of pantyhose over the wood; any snags indicate areas needing more sanding before finishing.
Hardware security requires regular inspection and proper installation:
- Use wood glue in addition to screws for maximum joint strength
- Choose screws over nails for connections you can tighten over time
- Countersink screw heads and fill holes to prevent snagging
- Avoid small decorative elements that could detach and become choking hazards
- Install safety brackets on anything taller than it is wide
Browsing safe stylish wooden nursery accessories provides real-world examples of how professional makers incorporate safety features without sacrificing aesthetics. These examples demonstrate that beautiful design and rigorous safety standards work together seamlessly when properly planned.
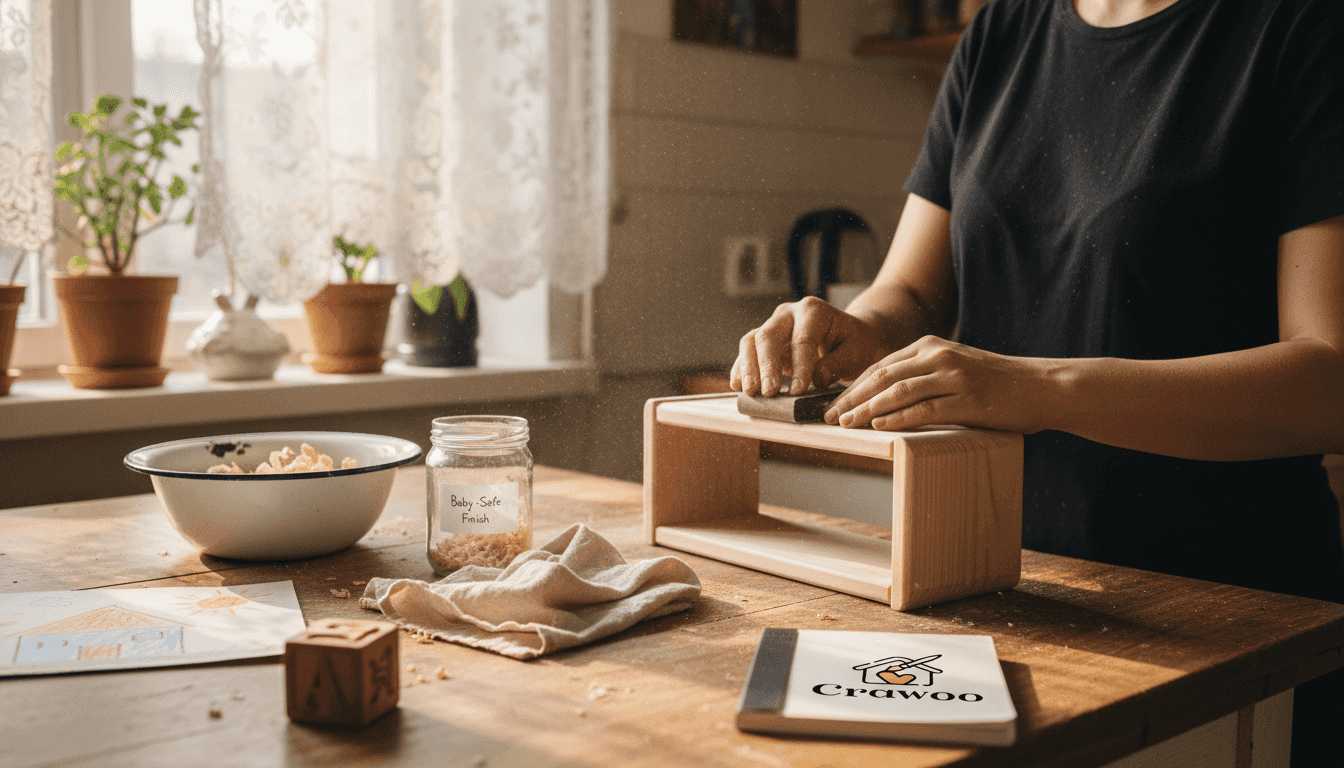
Step-by-step guide to crafting wooden nursery decor
Transforming raw wood into finished nursery decor requires methodical planning and execution. Following a structured approach ensures consistent results while maintaining safety throughout the building process. This systematic method works for projects ranging from simple name signs to more complex shelving units.
Gather your essential tools and materials before starting. Proper wood selection impacts both aesthetics and durability of your finished piece, so choose carefully based on your project requirements. Having everything ready prevents mid-project trips to the hardware store and maintains your workflow momentum.
| Tool/Material | Purpose | Safety Note |
|---|---|---|
| Hardwood boards | Primary building material | Check for knots and defects |
| Measuring tape | Accurate dimensions | Mark clearly before cutting |
| Circular or miter saw | Cutting wood to size | Use blade guards, wear eye protection |
| Sandpaper (80-220 grit) | Surface smoothing | Progress through grits systematically |
| Wood glue | Joining pieces | Allow full cure time before use |
| Finishing product | Sealing and protecting | Ensure low-VOC, baby-safe formulation |
Follow these numbered steps for successful project completion:
- Measure and mark your wood pieces precisely, double-checking dimensions before cutting to avoid waste.
- Cut all pieces using appropriate safety equipment including eye protection, hearing protection, and dust masks.
- Sand cut edges immediately to remove splinters and smooth rough areas from sawing.
- Dry-fit all pieces together before applying glue to verify proper alignment and fit.
- Apply wood glue to joining surfaces and clamp pieces firmly, wiping away excess glue immediately.
- Allow glue to cure fully according to manufacturer instructions, typically 24 hours for maximum strength.
- Sand entire assembly with progressively finer grits, ending with 220-grit for a smooth, baby-safe surface.
- Apply your chosen finish in a well-ventilated area, following product instructions for application and drying times.
- Allow finish to cure completely before placing in nursery, typically 3 to 7 days depending on product.
- Install mounting hardware if applicable, ensuring secure attachment to wall studs.
Pro Tip: Work in a well-ventilated space when cutting, sanding, or finishing wood, and keep these activities separate from living areas to prevent dust and fume exposure.
Personalization transforms functional pieces into meaningful nursery focal points. Consider incorporating your baby’s name using router lettering, wood burning, or painted designs. Geometric shapes, animal silhouettes, or themed motifs add visual interest while maintaining the clean, natural aesthetic of wood. Keep decorative elements securely attached and avoid small parts that could detach as adhesives age.
Exploring techniques for painting wooden nursery signs expands your creative options and helps you achieve professional-looking custom designs. These methods work equally well for adding color accents to shelves, name plaques, or decorative wall art.
Checking and finishing your wooden nursery decor for safety and style
The finishing phase determines both the longevity and safety of your wooden nursery decor. Proper finishing techniques seal the wood, enhance its natural beauty, and create a protective barrier against moisture and wear. Equally important, the right finishes ensure your pieces remain safe for the babies and toddlers who will interact with them daily.
Selecting baby-safe finishing products requires careful label reading and research. Solid wood furniture, especially with low-VOC finishes, emits significantly fewer harmful chemicals than alternatives. Look for products specifically labeled as low-VOC, zero-VOC, or formulated for children’s furniture. Water-based polyurethanes, natural oils like tung or linseed, and beeswax-based products offer excellent protection without toxic off-gassing.
Application technique affects both appearance and durability. Apply multiple thin coats rather than one thick coat to achieve even coverage and faster drying times. Thin coats penetrate wood fibers better, creating stronger bonds and more durable protection. Sand lightly between coats with 320-grit sandpaper to remove dust nibs and create mechanical adhesion for subsequent layers. Three to four thin coats typically provide adequate protection for nursery decor.
Pre-installation inspection catches potential safety issues before your piece enters the nursery:
- Run hands over all surfaces feeling for rough spots, splinters, or sharp edges
- Check all joints for tightness and stability, re-gluing if necessary
- Verify that decorative elements are securely attached and cannot be pried off
- Confirm mounting hardware is appropriate for the piece’s weight and wall type
- Test stability by applying gentle pressure from different angles
Anchoring heavy or tall pieces prevents tipping accidents as your child becomes mobile. Use furniture straps or L-brackets attached directly to wall studs, not just drywall. Position anchors high enough that they remain effective even if the piece shifts slightly. For wall-mounted items like shelves or large signs, use appropriate picture hangers or French cleats rated for twice the actual weight.
Maintaining your wooden nursery decor ensures ongoing safety and beauty. Dust regularly with a soft, dry cloth to prevent buildup that can dull finishes. Clean spills immediately with a slightly damp cloth, then dry thoroughly to prevent water damage. Inspect pieces monthly for loose hardware, finish wear, or developing cracks that could create splinter hazards. Tighten screws and re-apply finish to worn areas as needed.
Pro Tip: Keep a small container of your finishing product for touch-ups, as finishes can be discontinued or reformulated, making exact matches difficult years later.
Regular safety checks become more important as your child grows and develops new abilities. What posed no risk to a stationary infant may become a climbing temptation for an active toddler. Reassess placement and anchoring every few months, adjusting as your child’s capabilities change. Remove or relocate pieces that no longer suit your child’s developmental stage.
Learning from safe natural wooden nursery decor examples helps you understand professional finishing standards. Reviewing techniques for painting wooden nursery signs provides additional finishing options for customizing your pieces while maintaining safety.
Discover unique wooden nursery decor at Crawoo
While creating your own wooden nursery pieces offers incredible satisfaction, complementing your DIY projects with professionally crafted decor creates a cohesive, polished look. Crawoo specializes in handcrafted wooden nursery decorations designed specifically for parents who value both safety and personalization. Each piece combines quality craftsmanship with child-safe materials, giving you confidence in every addition to your baby’s room.

Explore the custom wooden nursery sign collection featuring personalized name plaques that coordinate beautifully with your DIY creations. The charming wooden animal wall decor adds whimsical touches that delight both parents and children. Browse the complete wooden sign collection to find pieces that complement your handmade items and complete your nursery vision. Every Crawoo piece arrives ready to hang, with safe finishes and secure mounting hardware included. Easy online ordering and fast delivery make creating your dream nursery simple and stress-free.
FAQ
How do I choose the safest wood for my baby’s nursery decor?
Select hardwoods like maple, cherry, or oak rather than composite materials to minimize exposure to formaldehyde and other VOCs. Solid wood furniture emits fewer harmful VOCs compared to composite materials, creating healthier indoor air quality. Finish your pieces with low-VOC or plant-based coatings specifically formulated for children’s furniture to further reduce chemical exposure.
What safety standards should I follow when making wooden nursery furniture?
Adhere to CPSC guidelines specify maximum slat spacing and stability requirements to prevent entrapment and tipping hazards. Keep all vertical slat spacing at 2 3/8 inches or less to prevent head entrapment. Ensure furniture has a stable base and anchor tall or heavy pieces securely to wall studs using appropriate hardware.
How can I personalize wooden nursery decor while keeping it safe?
Use non-toxic, low-VOC paints or stains when adding custom designs, names, or decorative elements to your wooden pieces. Avoid attaching small decorative parts that could detach and become choking hazards as adhesives age. Keep all surfaces smooth and ensure decorative elements are either carved directly into the wood or permanently attached with strong adhesives and mechanical fasteners. Techniques for painting wooden nursery signs demonstrate safe methods for adding color and personality.
How long should I wait before placing finished wooden decor in the nursery?
Allow water-based finishes to cure for at least 3 to 7 days before installation, even if they feel dry to the touch. Oil-based products require longer curing times, typically 2 to 3 weeks for complete off-gassing. Place finished pieces in a well-ventilated area during curing, keeping them away from living spaces. The finish should have no detectable odor before introduction to your baby’s room.
What maintenance do wooden nursery pieces require over time?
Dust your wooden decor weekly with a soft, dry cloth to prevent buildup that can dull protective finishes. Inspect pieces monthly for loose hardware, finish wear, or developing cracks that could create safety hazards. Tighten screws, re-apply finish to worn areas, and sand any rough spots that develop as the wood ages. Clean spills immediately with a slightly damp cloth followed by thorough drying to prevent water damage and warping.
Recommended
Subscribe to Our Newsletter
Leave a comment