


TL;DR:
- DIY wooden wall art offers affordable, personalized, and safe nursery decor options.
- Proper planning, measuring, and careful sanding are essential for a successful project.
- Using non-toxic paints, secure hardware, and safe placement ensures nursery safety and durability.
Every new parent dreams of a nursery that feels personal, warm, and uniquely theirs. But walk into any big-box store and you’ll quickly find that “unique” comes with a steep price tag, and most options look like they belong in a hundred other nurseries. DIY wooden wall art solves all three problems at once: cost, personalization, and safety. You control every material that goes near your baby, you choose the design that matches your vision, and you end up with something no one else has. This guide walks you through each stage, from gathering supplies to hanging your finished piece, with beginner-friendly steps the whole way.
Table of Contents
- Gathering your materials and planning your design
- Preparation: Sketching, measuring, and cutting your base pieces
- Step-by-step assembly: Painting, gluing, and finishing techniques
- Final touches: Adding personalized details and ensuring nursery safety
- Why DIY wooden wall art is more rewarding than store-bought decor
- Take your nursery decor further with custom wooden wall art
- Frequently asked questions
Key Takeaways
| Point | Details |
|---|---|
| Start with simple materials | You only need basic plywood, non-toxic paints, and safe glue to begin your wall art project. |
| Use beginner techniques | The glue-and-stain method lets you create beautiful effects even without painting experience. |
| Prioritize safety | Always use non-toxic finishes and follow safety steps to ensure your art is nursery-ready. |
| Personalize for meaning | Adding your baby’s name or birth date makes your DIY project truly special and unique. |
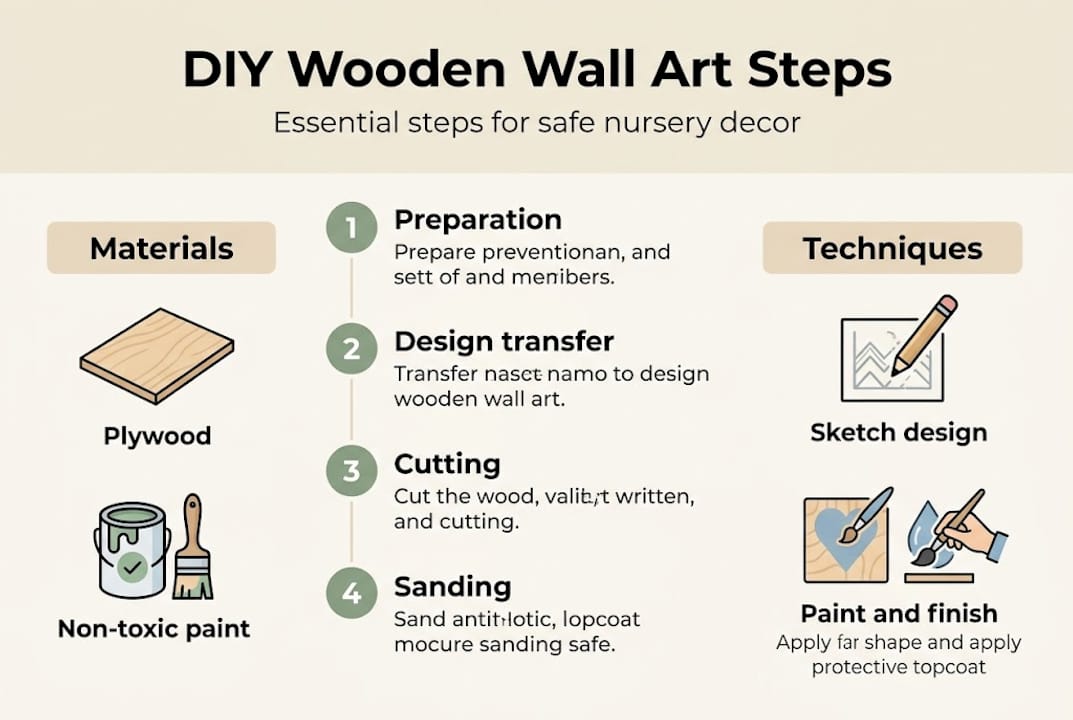
Gathering your materials and planning your design
Before you pick up a paintbrush, a clear material list and a solid design idea will save you hours of frustration. DIY wooden wall art for nurseries commonly involves framed scenic pieces or personalized name signs using plywood, moulding, non-toxic paints, stains, and glues. That means your shopping list is straightforward and most items are available at any hardware or craft store.
Here is everything you will need:
- Plywood or birch board (1/4 inch thickness works well for wall pieces)
- Pre-cut decorative moulding for framing
- Sandpaper (120-grit and 220-grit)
- Non-toxic, water-based stain in your chosen shade
- Child-safe acrylic paint in your color palette
- Wood glue or Mod Podge for shading effects
- Small brush set including flat, round, and detail brushes
- Pencil and ruler for layout
- Jigsaw or hand saw (or ask your hardware store to cut pieces for you)
- Hanging hardware rated for the weight of your piece
| Item | Primary use | Safety note |
|---|---|---|
| Plywood | Base panel | Choose formaldehyde-free grades |
| Acrylic paint | Color and design | Must be labeled non-toxic |
| Wood stain | Background shading | Water-based only for nurseries |
| Wood glue/Mod Podge | Shading technique | Non-toxic, low-VOC formulas |
| Hanging hardware | Wall mounting | Use anchors rated for the weight |
For your theme, think about what will grow with your child. Animals, soft landscapes, and custom wood name signs are all timeless choices that stay relevant from infancy through early childhood. A woodland animal scene works as well for a newborn as it does for a curious four-year-old. If you want more ideas before committing, browsing personalizing nursery wall art can spark a direction that feels right for your space.
Pro Tip: Test your chosen paint and stain combination on a scrap piece of wood before touching your main panel. Colors look different on raw wood than they do on the label, and a quick test saves you from an unpleasant surprise mid-project.
For more wooden wall art inspiration, look at finished nursery pieces online and note which color palettes and layouts catch your eye. Then simplify. First-time DIYers do best with one focal element, one background treatment, and one accent color.
Preparation: Sketching, measuring, and cutting your base pieces
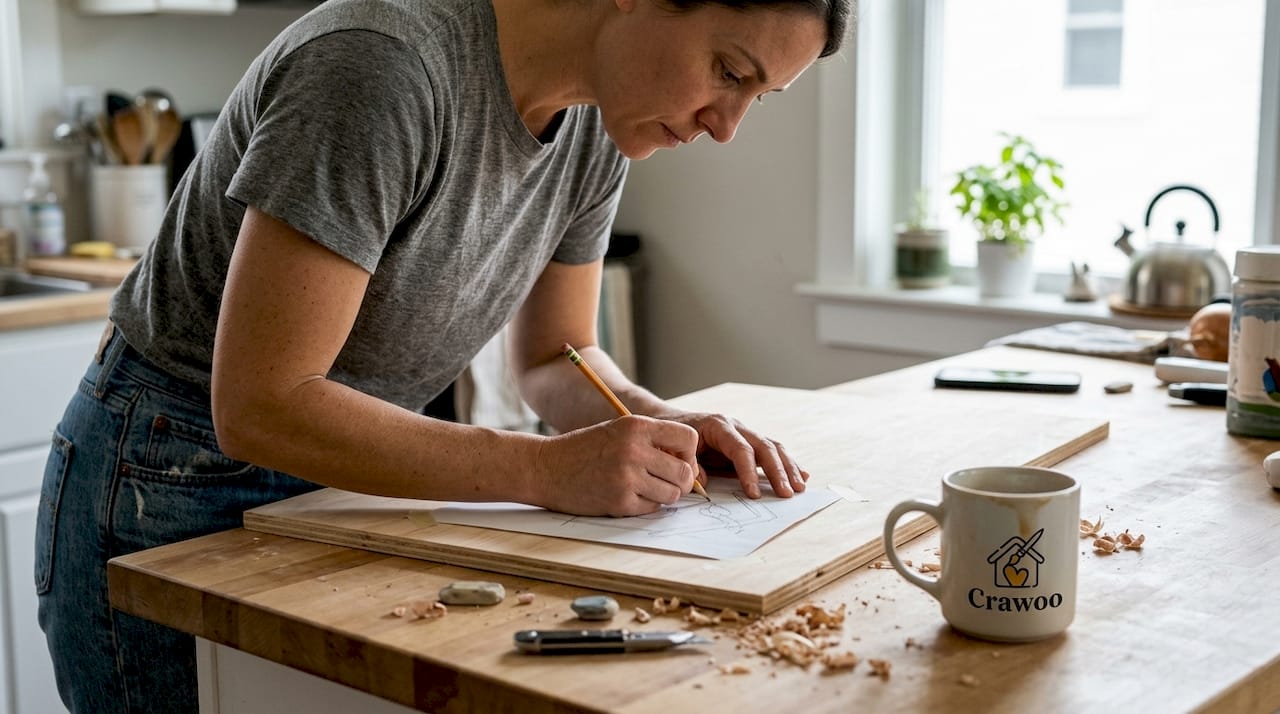
With your supplies ready and design picked out, it is time to turn your vision into a workable plan. Rushing this stage is the most common beginner mistake. Careful prep means cleaner cuts, straighter lines, and far less sanding later.
Start by sketching your full design on paper at roughly the same scale as your finished piece. This does not need to be gallery-quality art. Simple outlines and color notes are enough to guide you. Once your paper sketch feels right, follow these steps:
- Measure your wall space and decide on the final dimensions of your art piece. A 12x16 inch panel is a great starter size.
- Mark your plywood with a pencil and ruler, double-checking measurements before any cut.
- Cut your base panel using a jigsaw or hand saw. If you are not comfortable with power tools, most hardware stores will cut to size for free or a small fee.
- Cut your moulding pieces at 45-degree angles at the corners so they meet cleanly, just like a picture frame.
- Dry-fit your frame around the panel before any glue or nails go in. Adjust if needed.
- Sand the panel surface with 120-grit sandpaper, then finish with 220-grit for a smooth, splinter-free result.
The steps of cut, sand, sketch, paint, stain, frame, and hang follow a logical sequence for a reason. Each stage prepares the surface for the next. Skipping sanding, for example, means paint sits unevenly and peels faster.
Safety first: Always wear protective goggles when cutting wood. Secure your board with clamps before sawing so it cannot shift mid-cut. Keep children and pets out of your workspace during this stage.
Once your panel is sanded smooth, lightly transfer your paper sketch onto the wood surface using a pencil. Press lightly so lines erase cleanly if you need to adjust. For nursery sign painting tips that make the transfer process even easier, consider using carbon transfer paper to trace complex shapes without freehand stress.
Step-by-step assembly: Painting, gluing, and finishing techniques
With your wooden pieces measured and cut, you can now bring your design to life. This is the stage most people feel nervous about, but the right sequence makes it surprisingly manageable even for complete beginners.
- Apply a base coat of your background color using a wide flat brush. Let it dry fully, at least one hour.
- Paint your main design elements using your sketched pencil lines as a guide. Work from background to foreground, letting each layer dry before adding the next.
- Apply wood glue or Mod Podge in the areas where you want a shaded or textured effect. Brush it on in loose, organic strokes.
- While the glue is still wet, brush your water-based stain over the top. The glue resists the stain in some areas and absorbs it in others, creating natural-looking depth and contrast.
- Let everything dry completely before touching or moving the piece, usually two to three hours.
- Attach your moulding frame using wood glue and small finishing nails. Wipe away any excess glue immediately with a damp cloth.
- Attach your hanging hardware to the back of the frame, following the manufacturer’s weight guidelines.
The glue-and-stain technique creates contrasting shades without advanced painting skills, making it ideal for beginners who want a professional-looking result without years of practice. It is genuinely one of the most forgiving methods in DIY wood art.
Pro Tip: Run painter’s tape along any edge where two colors meet before painting. Press it down firmly, paint your color, and peel the tape off while the paint is still slightly wet. You will get crisp, clean borders every time.
If you are adding your baby’s name as part of the design, now is the moment. Check out ideas for customizing with your baby’s name to see how lettering placement and font style can completely change the feel of a piece. For something a little different, inspiration for floral wall art shows how botanical elements pair beautifully with name lettering.
Final touches: Adding personalized details and ensuring nursery safety
Once your base is finished and decorated, just a few steps remain to ensure your art is personalized, safe, and ready for the nursery. This is where your piece goes from a pretty craft project to something genuinely meaningful.
To add your baby’s name, initials, or birth date, you have two main options: painting directly onto the wood or applying pre-cut wooden letters. Both work well, but they suit different skill levels and budgets.
| Method | Cost | Ease | Durability |
|---|---|---|---|
| Hand-painted lettering | Low | Moderate | High if sealed |
| Pre-cut wooden letters | Low to medium | Very easy | High if glued securely |
Pre-cut letters are a great shortcut if freehand lettering feels intimidating. You can find them at craft stores or browse shopping pre-made wooden name signs for ready-to-hang options that skip the DIY entirely.
Once your personalization is in place, run through this safety checklist before hanging anything in the nursery:
- Smooth all edges with 220-grit sandpaper. Run your hand across every surface and corner.
- Check that all hardware is tight and rated for at least twice the weight of your piece.
- Confirm all paints, stains, and glues are non-toxic and fully cured before the piece enters the nursery.
- Position art away from the crib, on a wall your baby cannot reach or pull.
- Wipe the finished piece with a slightly damp cloth to remove any dust or residue from the crafting process.
Non-toxic paints, stains, and secure hardware are non-negotiable for child safety in nursery decor. A beautiful piece that is not safely finished is not ready for the wall.
Why DIY wooden wall art is more rewarding than store-bought decor
Here is something no one tells you before you start: the finished piece matters far less than the process of making it. When your child is old enough to ask about the art on their wall, you will have a real story to tell. That story, the afternoon you spent sketching and painting and figuring it out, becomes part of the room’s meaning in a way that a shipped-from-a-warehouse print never could.
There is also a practical confidence that comes from this kind of project. You learn what materials are actually in your child’s environment. You make deliberate choices about every finish and fastener. That level of control is genuinely rare in parenting, and it feels good.
Many parents also find that DIY decor reflects their child’s identity in ways that personalizing nursery wall art through a store simply cannot match. You are not choosing from twelve preset options. You are building something that did not exist before. And honestly, it usually costs less too.
Take your nursery decor further with custom wooden wall art
Not every parent has the time or tools to DIY from scratch, and that is completely fine. Sometimes you want the warmth and personality of handcrafted wooden decor without the full project commitment.

At Crawoo, we design personalized round name signs and a full range of custom wooden pieces made specifically for nurseries and children’s rooms. Every sign is crafted with child-safe finishes and built to last through the toddler years and beyond. If you are ready to skip the saw and still get something truly one-of-a-kind, explore custom nursery sign options and find a design that fits your vision perfectly.
Frequently asked questions
What type of wood is safest for baby nursery wall art?
Plywood or birch, finished with non-toxic, water-based paints or stains, is the safest choice for nurseries. Always look for formaldehyde-free grades when selecting your board.
How do I hang wooden wall art securely above a crib?
Use heavy-duty mounting anchors rated for at least twice the weight of your piece, and secure hardware placement well out of your baby’s reach. Never hang art directly over the sleeping area.
Can I personalize wooden wall art if I don’t have painting skills?
Absolutely. The glue-and-stain technique creates beautiful shading without advanced painting, and pre-cut wooden letters let you add names without any freehand work at all.
How long does a simple DIY wooden wall art project take?
Most beginners can complete a basic piece in a single afternoon, following the cut, sand, paint, stain, and hang sequence. Budget extra time for paint and glue drying between steps.
Recommended
Subscribe to Our Newsletter
Leave a comment